Appointing a Representative: Step-by-Step
-
Click the “Representatives” link under the “Profile” section of the left-navigation menu.
NOTE: Make sure that you have the delegation code of the person whom you wish to appoint as your representative. This code is a 10-digit set of numbers.
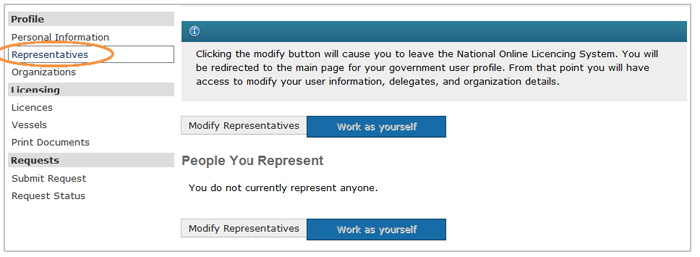
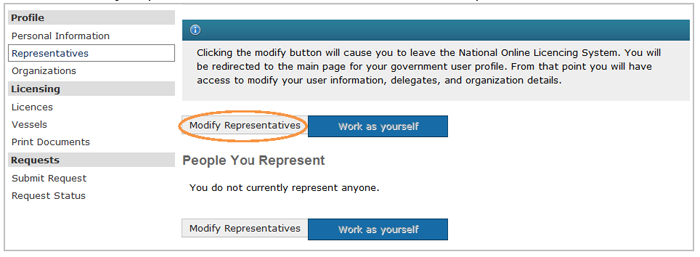
- Click the “Modify Representatives” button above “Your Current Representatives” section.
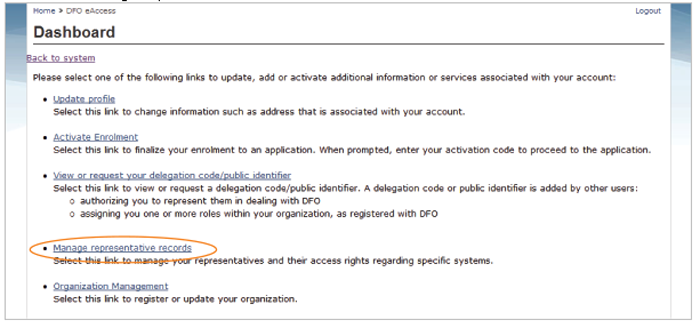
- Click the “Manage representative records” link.
- Click the “Create new representative record” button.

-
Type your representative’s delegation code in the white box. Then, click the “Next” button.
TIP: There is a limit to the number of delegates that may represent you/that you may represent in the system. If you receive a delegation limit warning, contact the representative or Client Support for assistance.

-
Click the “Next” button.

-
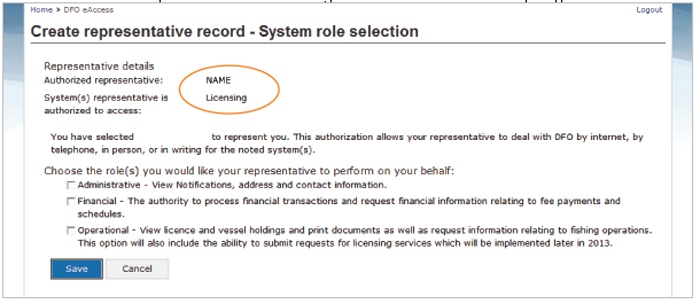
The “Authorized representative” on the screen should be the name of your representative
TIP: If this is not the person you wanted to appoint to be your representative, click the “Cancel” button until you return to the “Delegation Code” screen. Then, retype the code.
-
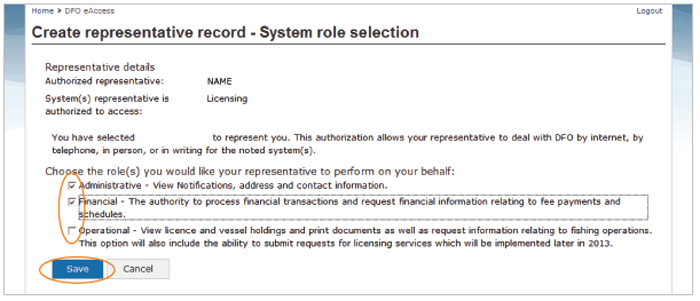
Click your cursor in the box beside the role or roles that you want your representative to do on your behalf. Then, click the “Save” button.
ROLES:
- Administrative: The ability to receive and view notifications, address and contact information.
- Financial: The authority to process financial transactions and request financial information relating to fee payments (licensing, fisher registration or vessel registration payments) and schedules.
- Operational: The ability to view licence and vessel holdings, print documents, submit requests and request information relating to fishing operations and licensing services.
TIP: To deselect a role, click the box again.
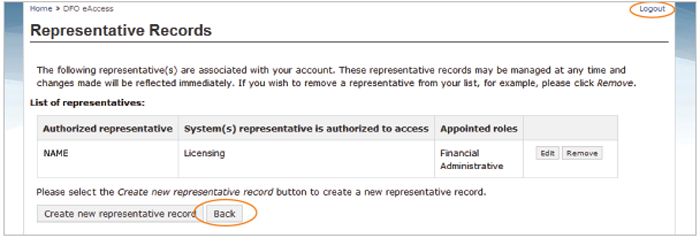
- Verify that the information is correct. Then, click the “Logout” link to end the process or click the “Back” button to return to the National Online Licensing System.
- Date modified: