
Submitting a Request and Checking the Request Status: Step-by-Step
You can submit licensing requests for licensing services using the online system. To submit a request to DFO, follow the steps below.
Submit Request:
-
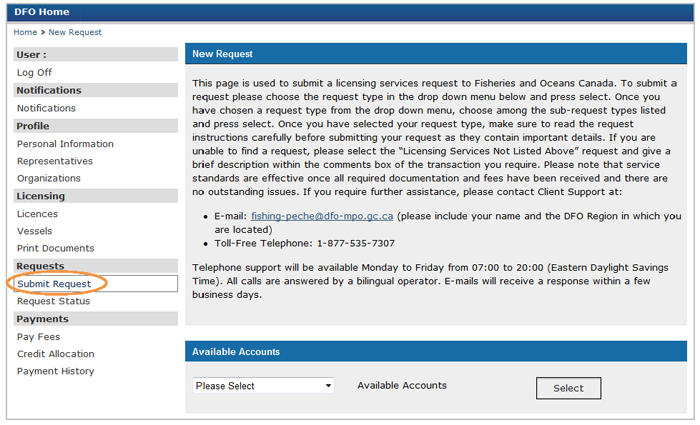
Click the “Submit Request” link under the “Requests” section of the left-navigation menu.
-
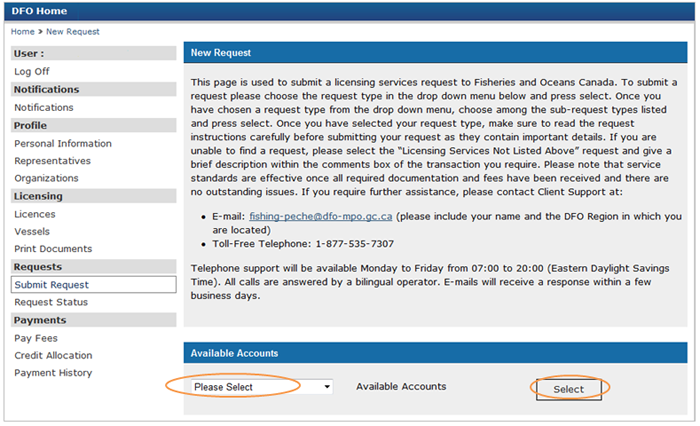
If you are acting as a representative or if you are submitting a request on behalf of an Organization, then you must select the available account name that you wish to work from.
-
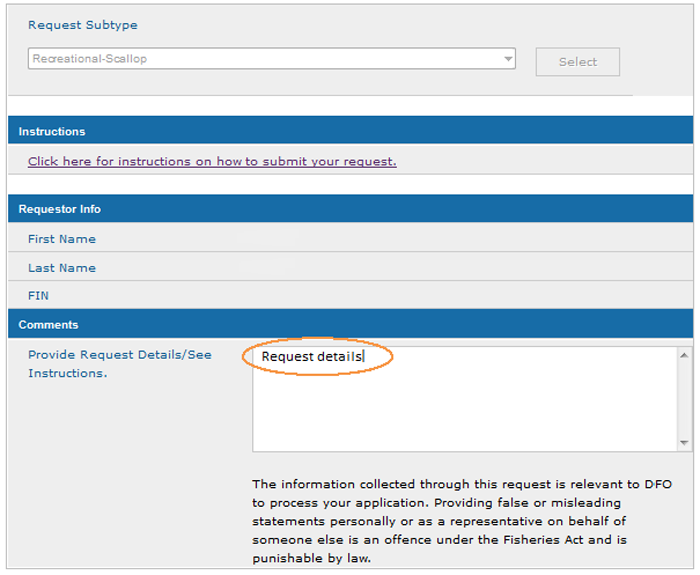
Choose the request type that you would like to submit from the drop-down menu, once you have chosen a request type, you will need to click on the select button.
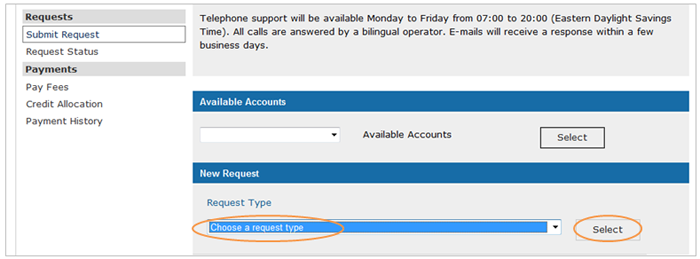
Note: You may need to select a request sub-type from the drop-down menu if applicable, once you have chosen a request sub-type, you will need to click on the select button.

-
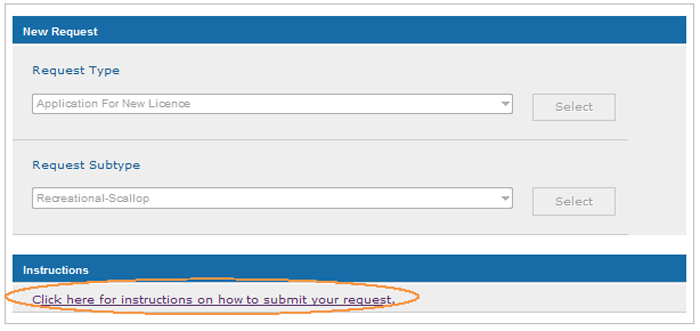
Click on the Instructions hyperlink “Click here for instructions on how to submit your request.” These instructions will open in a new window and will provide a description of the request, as well as all of the details you will need in order to submit the request.
-
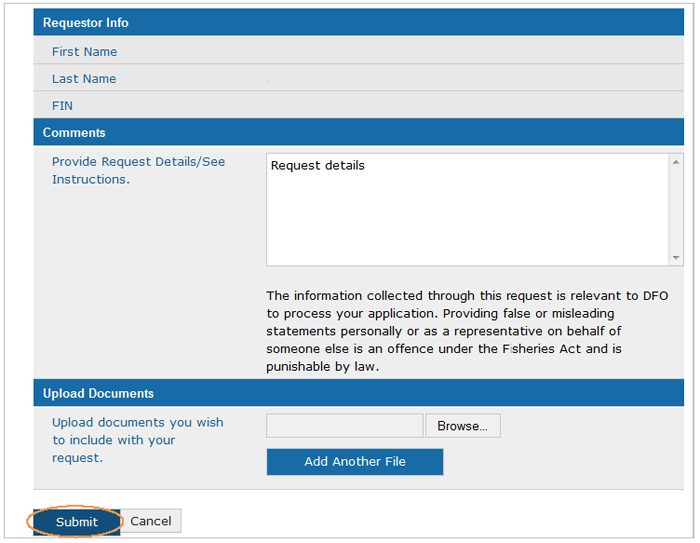
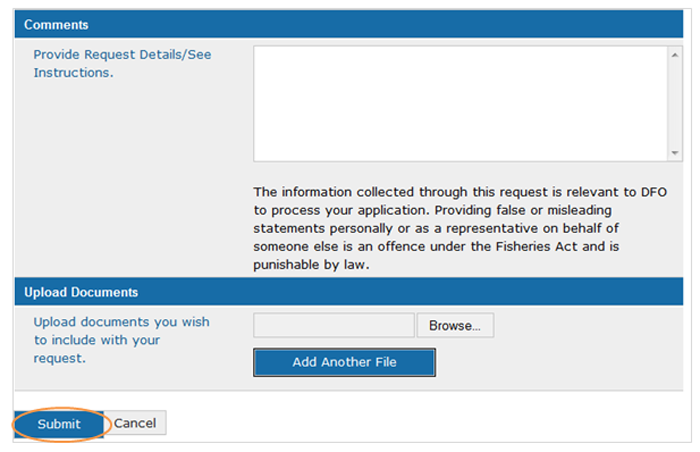
Insert any request details by clicking into the “Comments” box as indicated on the instructions page.
-
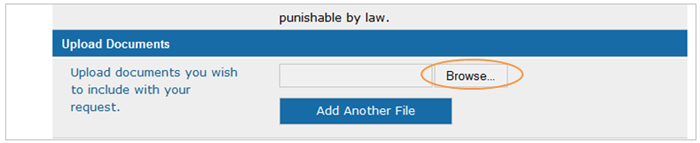
If the instructions require that you attach documents to your request, click on the “Browse” button to upload any documentation that you would like to include with the request. Click on the “Add Another File” button to include more than one document.
-
Click on the “Submit” button to submit the request. Click on the “Cancel” button to cancel the request.
Note: A unique request ID number will be generated once you have submitted your request. Please include this number in all your correspondence with the Department.
Note: You will receive a notification in your account under the “Notifications” screen when you have submitted a request. You will not be informed of any changes to your requests by email or through the “Notifications” screen. Follow the steps below to check on the status or amend your request.
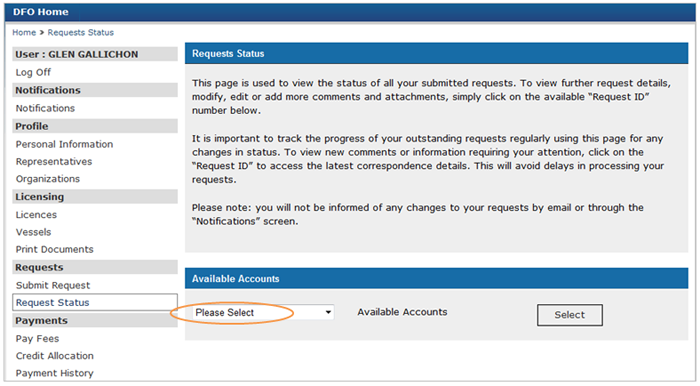
Checking a Request Status and Modifying a Request:¸
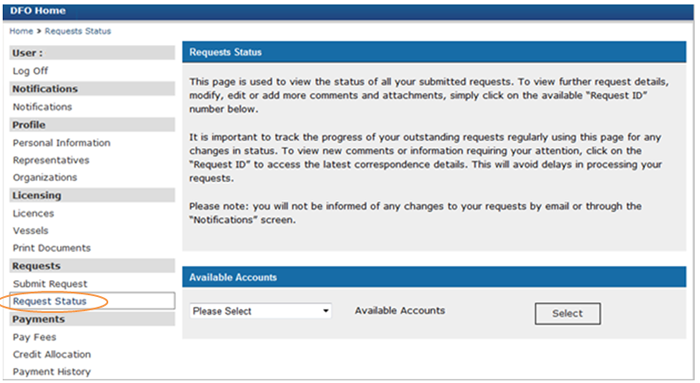
Click on the “Request Status” link under the “Requests” section of the left-navigation menu.
-
If you are acting as a representative or if you are submitting a request on behalf of an Organization, then you must select the available account name that you wish to work from.
-
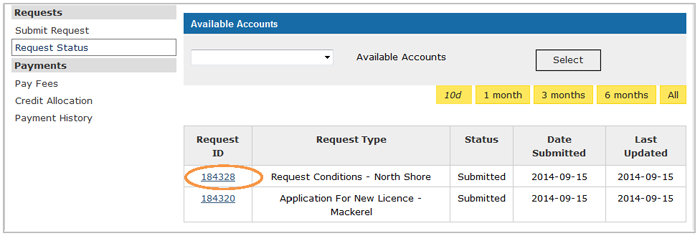
Select the “Request ID” link to open the Request Type you want to view in more detail.
-
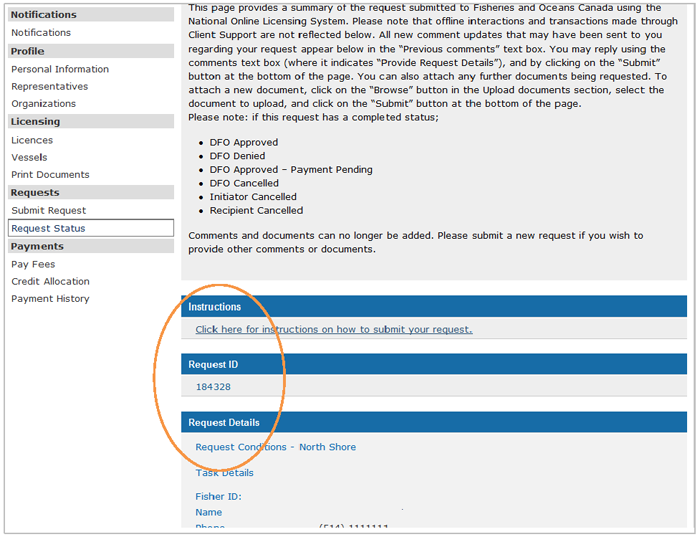
You can still see the Instructions and Request Details for this request and can now take note of the Request ID for future reference.
-
If you wish to amend your request or provide additional information, you can do so by clicking into the “Comments” box.
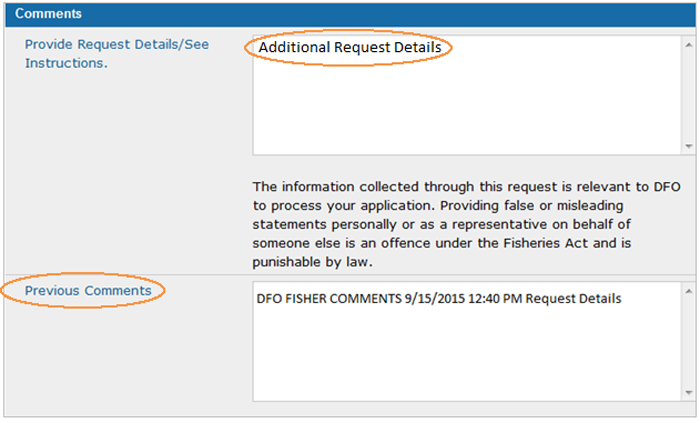
Note: You can now view any previous comments. This may include the comments that you inserted when you submitted the request, as well as additional comments that Fisheries and Oceans Canada may have made.
-
If required, click on the “Browse” button to upload any additional pertinent documentation to include with the request. Click on the “Add Another File” button to include more than one document.
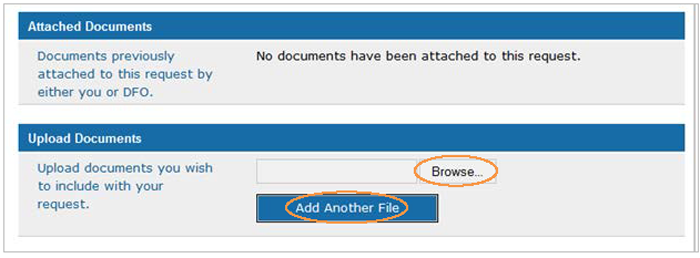
Note: You can now view any previously attached request documents under the “Attached Documents” section. This may include documents uploaded by Fisheries and Oceans Canada.
-
Click on the “Submit” button to submit the request. Click on the “Cancel” button to cancel the request.
- Date modified: