
Tutorial: Attribute table
To find widgets in the atlas, see the user guide.
The Attribute Table allows users to visualize the tabular data associated with a map layer. It can also filter the data in a layer in 2 ways:
- by using the map extent (i.e. the current view of the map)
- by constructing a query that uses information in the attribute table to select a subset of the data
Not all layers will have attribute tables, but for those that do, working with the attribute table can be a powerful way of understanding more about the data than just its spatial characteristics.
Steps
- We'll start by viewing the attribute table for a layer in the Layer List widget. Click on the Layer List widget.

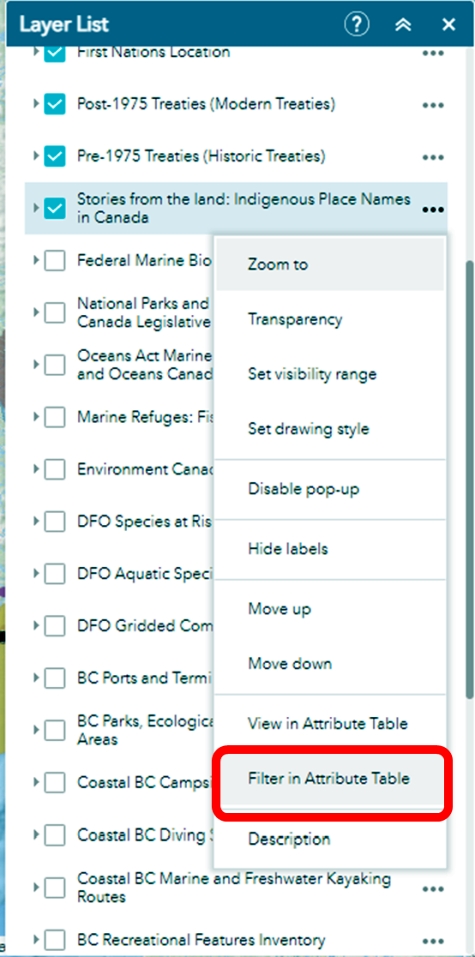
- For the layer you're interested in, click the three dots beside the layer to access its dropdown menu. In this case we're going to use the attribute table from the “Stories from the land: Indigenous Place Names in Canada” layer.
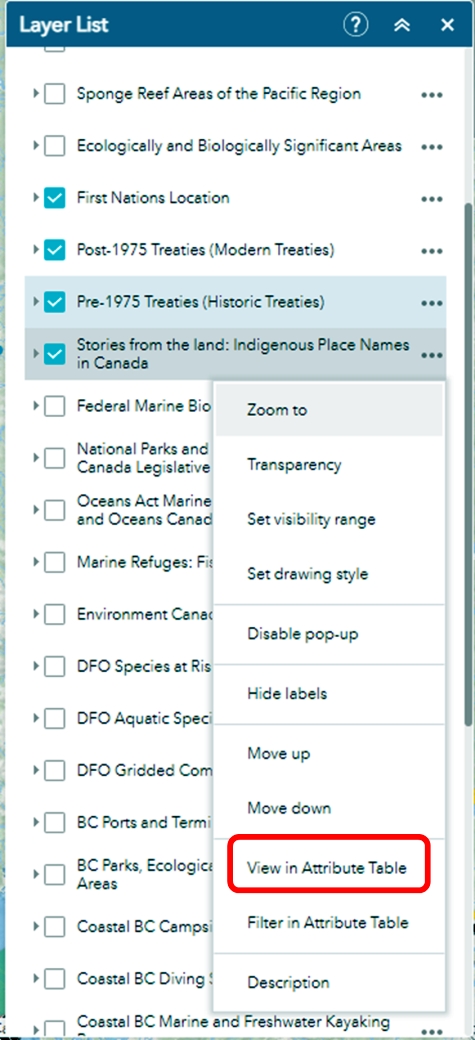
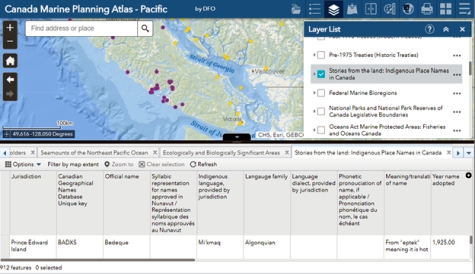
- Click “View in Attribute Table.” The attribute table for the layer will appear at the bottom of the screen.
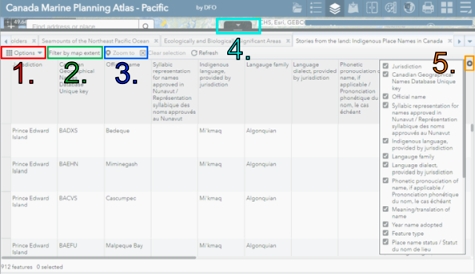
- A number of other actions can be taken with buttons initially visible in the attribute table:
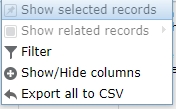
- The Options button opens a dropdown menu to take more actions with the attribute table (see image at right). This includes creating a filter query, showing and hiding columns, and exporting to CSV.
- Filter by map extent reduces the number of layers in the attribute table to what is currently visible in the map.
- Zoom to moves the map to a record (or records) that have been selected. Selecting records can be done by clicking on the right side of the attribute table (i.e. in the empty grey rectangle to the left of “Prince Edward Island” above).
- Clicking on the tab with the triangle at the centre of the attribute table bar hides or reveals the attribute table. Clicking and dragging the longer black bar resizes the attribute table.
- Clicking the plus button at the top right of the attribute table allows users to choose which fields (columns) they want shown. Fields can be toggled on and off using the check boxes.
- We can construct a filter query to find particular records in the attribute table. The quickest way to do this is from the layer list. Click the three dots beside a layer to access its dropdown menu, and choose Filter in Attribute Table.
We can also click the Options button in the attribute table pane and choose Filter.
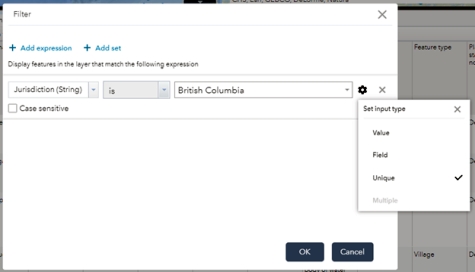
Both methods will display the Filter window, shown below.
- Construct a filter query by clicking the Add expression or Add set buttons. Add expression add a single-clause logical expression, while Add set adds a multi-clause logical expression.
For example, using the Stories from the land… layer, we can add an expression to only show those values whose Jurisdiction is equal to “British Columbia”.
To do this, click Add expression, then click the dropdown menu on the left to choose the Jurisdiction field, which contains string, or text, values. The logical operator dropdown is in the middle, and we can leave that as “is.” Because we're looking for text values equal to “British Columbia”, we next want to click the gear to the right of the dropdowns and choose the input type “Unique.” We can then select British Columbia from the dropdown menu next to the gear.
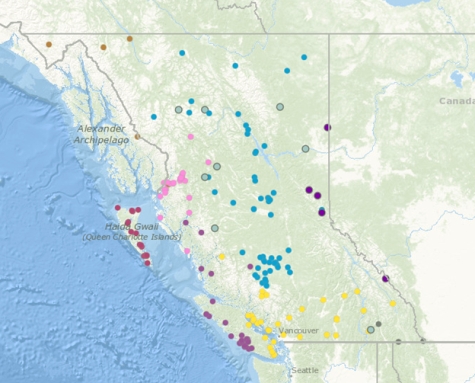
- Clicking OK should return a subset of the data in the attribute table, and only show points in BC on the map. More information on the Filter widget and how to construct custom filter queries can be found on the ArcGIS website.

- Date modified: