
User training manual
5. Licensing Transactions
The National Online Licensing System will provide DFO Clients with the ability to complete all standard licensing transactions, including:
- Renewals of licences, fisher registration cards, and vessel registrations;
- Fee payments to renew licences, fisher registration cards, vessel registrations;
- Submitting requests and checking the status of requests; and
- Printing of licences, licence conditions, fee payment receipts, and other licensing documents.
5.1 Printing Documents
To print one or more of your documents from the National Online Licensing System, click on the “Print Documents” link under the “Licensing” section on the left-navigation menu. You must be using a computer that is connected to a printer to print these documents or you may save the documents on a data storage device, such as a USB key, to bring to a local print shop.Footnote 44
The “Print Documents” section will list your fishing licences, fisher registration information, vessel registration information, and other licensing documents once you have paid all of the associated fees and these payments have been processed by Fisheries and Oceans Canada. Any document that is issued to a DFO Client as a result of a request (i.e., a licence or licence conditions, fisher registration cards, vessel registration documents, etc.) will be available for printing through the "Print Documents" hyperlink to the left of the screen. However, specific documents or forms related to requests can only be viewed or printed in the "Requests" section. You will need to open the request and may print the documents using Adobe or similar software. Please refer to Section 5.2.2 to see more information on printing these documents. You will always be notified when a new document has been added to your account. You are required to print these documents so that you have them onboard when you participate in a fishery.
Important Note
You will always be notifiedFootnote 45 when a new document has been added to your account. You are required to print these documents so that you have them onboard when you participate in a fishery.
5.1.1 Printing Licence / Condition Documents
Click one of the licence document hyperlinks which are located in the “Document Name” column of the “Licence / Condition Documents” table on this screen.

A “File Download” pop-up window will appear to ask you if you want to “Open” or “Save” the requested document, or “Cancel” your request. Click the “Open” button if you want to print the document from your computer right away. The document will open in your portable document format (PDF) browser, such as Adobe® Reader.Footnote 46 Click the printer icon on the tool bar of your PDF browser and your printer will start printing this document. A “pop-up” window is a graphical image that suddenly appears on your screen when you are seeking to complete a task from the screen that appears behind the pop-up image.
Quick Tip
A “pop-up” window is a graphical image that suddenly appears on your screen when you are seeking to complete a task from the screen that appears behind the pop-up image.
Click the “Save” button if you want to save the document on your computer or on a data storage device, such as a USB key, so you can print this document later or from a different computer. Your Windows Explorer or other File Manager pop-up window will appear so you may choose the folder on your computer system (or the external drive of your USB key) where you would like to save and store the document. Once you have chosen the location, click the “Save” button.
5.1.2 Printing Fisher or Organization Documents
Click one of the fisher registration document hyperlinks which are located in the “Document Name” column of the “Fisher or Organizations Documents” table on this screen.

A “File Download” pop-up window will appear asking you if you want to “Open” or “Save” the requested document, or “Cancel” your request. The same process described in Section 5.1.1 may then be followed.
5.1.3 Printing Vessel Registration Documents
Click one of the vessel registration document hyperlinks which are located in the “Document Name” column of the “Vessel Registration Documents” table on this screen.

A “File Download” pop-up window will appear asking you if you want to “Open” or “Save” the requested document, or “Cancel” your request. The same process described in Section 5.1.1 may then be followed to either “Open” or “Save” the requested document.
5.2 Requests
You may use the National Online Licensing System to submit licensing requests to Fisheries and Oceans Canada. In order to submit a request or check the status of a request, you must select the “Submit Request” hyperlink or the “Request Status” hyperlink from the left navigation menu.
5.2.1 Submit Request – Comments and Upload Documents
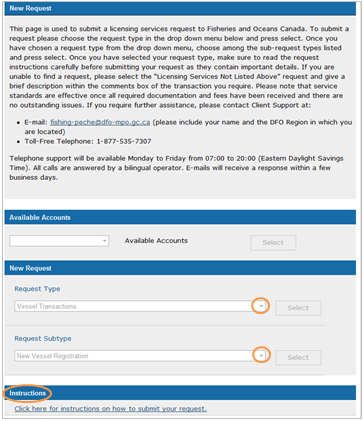
To submit a request, please choose the request type from the drop-down menu and press select. Once you have chosen a request type from the drop-down menu, choose among the request sub-types listed and press select. Once you have selected your request type, make sure to read the request instructions carefully before submitting your request as they contain important details.
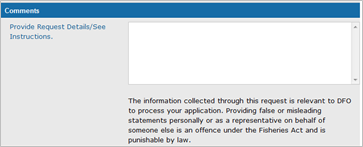
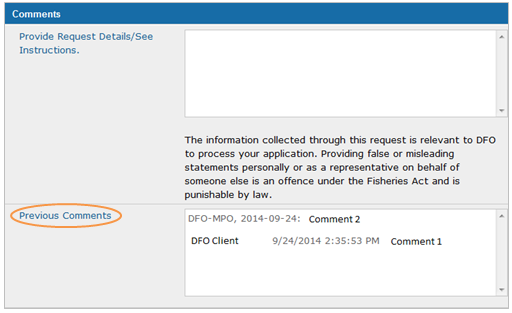
The comments box and the upload documents section will help you to adhere to the requirements/instructions and allow you to provide more detail. Insert any comments concerning the request into the comment box by clicking your cursor into the comment box itself. These boxes are designated for you to provide the details that are laid out in the request instructions. There is a minimum of five characters and up to 1900 characters available for all comments.
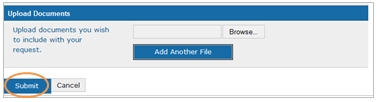
When uploading documents, please note that there are only a number of document types that may be uploaded, these are as follows: PDF, DOC, DOCX, JIF, JPG, PNG and TXT documents. Once you have provided all of the information detailed in the request instructions, you may click “Submit” at the bottom of the page. You will always receive a notification in the system when a new request has been submitted from your account. If you no longer wish to submit the request, you can select “Back” to return to the National Online Licensing System. This page is used to view the status of all your submitted requests. To view further request details, modify, edit or add more comments and documents to your request, you will need to click on the available “Request ID” number within the Request Status menu.
5.2.2 Request Detail – Comments, Upload Documents and Status
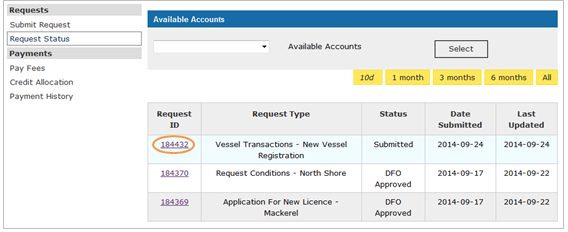
This page is used to view the status of all your submitted requests. To view further request details, modify, edit or add more comments and documents to your request, you will need to click on the available “Request ID” number within the Request Status menu.
All new comment updates that may have been sent to you regarding your request will now appear below, in the “Previous comments” text box. You may reply to Fisheries and Oceans Canada (DFO-MPO) comments by clicking in the comments text box itself.
All attachments regarding your request will now appear in the “Attached Documents” section. If you wish to print any of these documents, you can select the document link and print through Adobe Reader or other similar software. Please refer to Section 8.2 and 8.3 for more information on opening and printing documents. These documents are important to keep for your records and can be used to fulfill specific licensing requirements. You may need to upload additional documentation for your request in the Upload Documents section, by clicking on the “Choose File” button. If you wish to upload more than one document, then you can do so by clicking on the “Add Another File” button.
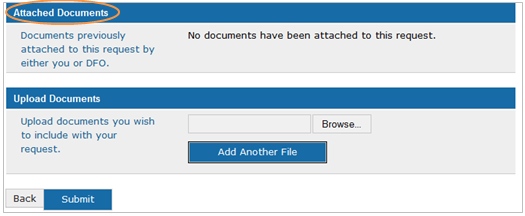
Once all of these steps have been taken, you may submit the changes to your request by clicking on the “Submit” button at the bottom of the “Request Detail” screen. If you no longer wish to submit the changes to your request, you can select “Back” to return to the National Online Licensing System.
Please note the possible status changes that Fisheries and Oceans can make to your request:
- DFO Approved
- DFO Denied
- DFO Approved – Payment Pending
- DFO Cancelled
- Initiator Cancelled
- Recipient Cancelled
Important Note
Comments and documents can no longer be added if the request has been completed. Please submit a new request if you wish to provide other comments or documents.
5.3 Paying Fees
You may use the National Online Licensing System to pay your licence, fisher registration,Footnote 47 vessel registration and any additional fees.
Important Note
You will always be notifiedFootnote 48 when new fees have been added to your account. You must pay these fees, and the transaction must be processed by Fisheries and Oceans Canada, before your documents will be released to your account on the system for you to print.
To pay one or more of your fees, click on the “Pay Fees” link under the “Payments” section on the left-navigation menu.
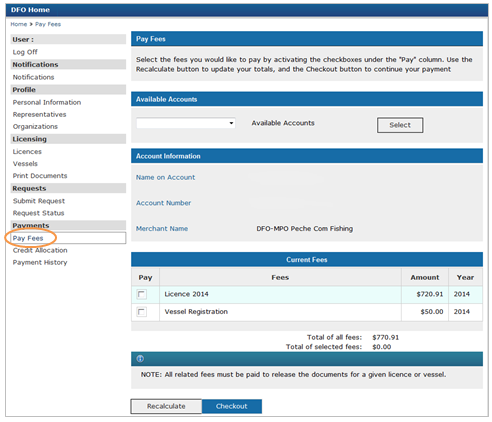
The “Current Fees” section will list all of the fees that you presently owe to the Department. Click your cursor in the white box beside the fees you wish to pay and a checkmark will appear in each box you click. If you want to deselect one of the fees, click on the box a second time to remove the checkmark. If you are paying more than one fee, click the “Recalculate” button to reflect the total of all fees selected, before you click the “Checkout” button.
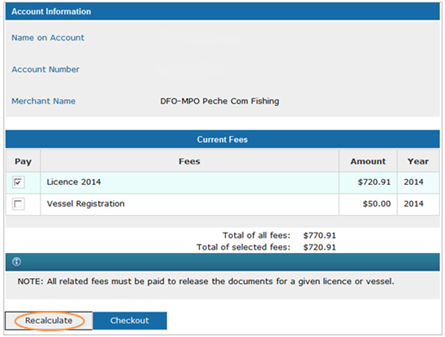
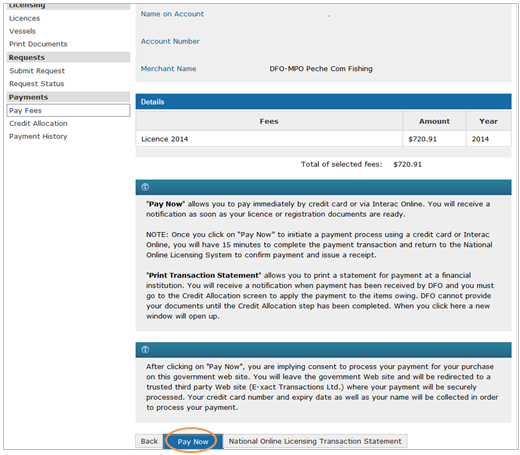
The “Pay Fees – Checkout” screen will appear when you click the “Checkout” button. This screen will show you all the fees that you decided to pay and the total amount of your payment. Review the list to ensure that the information is correct. If you want to make any changes, click the “Back” button to return to the “Pay Fees” screen.
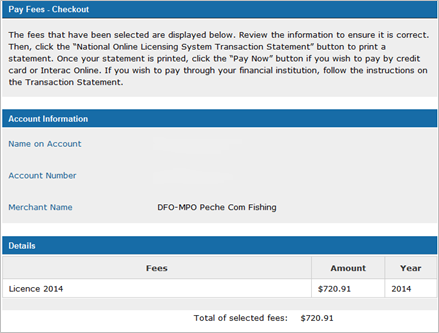
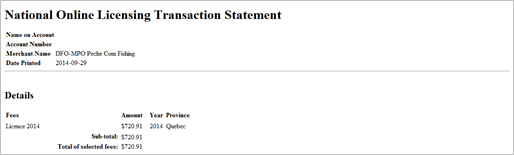
If you are ready to proceed, click the “National Online Licensing System Transaction Statement” button to print a statement.
Note;
his step is important to take, even if you plan to pay your fees right away with a credit card or using Interac Online, because you should attach this statement to your transaction receipt after you have made a payment.Footnote 49
The rest of the process to pay fees differs according to your preferred payment method: by credit card; by Interac Online; or through your financial institution. The following sub-sections cover each of these processes.
5.3.1 Paying Fees by Credit CardSection 5.3
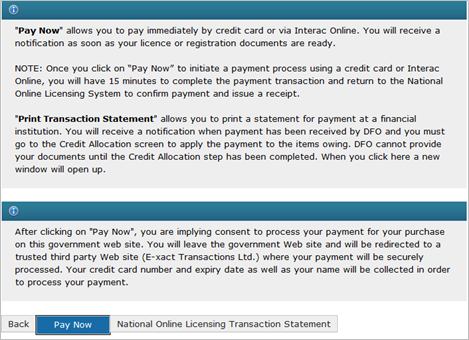
Click the “Pay Now” button on the “Pay Fees – Checkout” screen after completing the steps outlined above in .
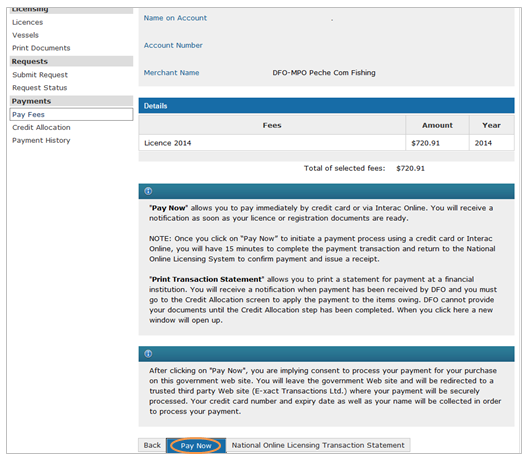
You will be directed to a secure, third-party website where your payment will be processed.

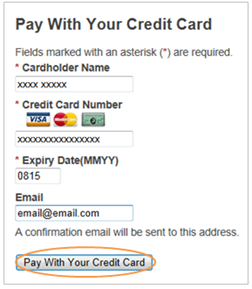
Before you enter your credit card information, review the total amount of your payment to ensure that it is correct. If it is incorrect or if you need to make any changes, click the “Return to National Online Licensing System” hyperlink.
If the information is correct, enter the name on the credit card, the credit card number, and the expiry date into the boxes highlighted on the screen image below. Next, enter your e-mail address so a confirmation of payment e-mail may be sent to you.
Then, click the “Pay with your Credit Card” button.
A receipt of your payment transaction will appear.
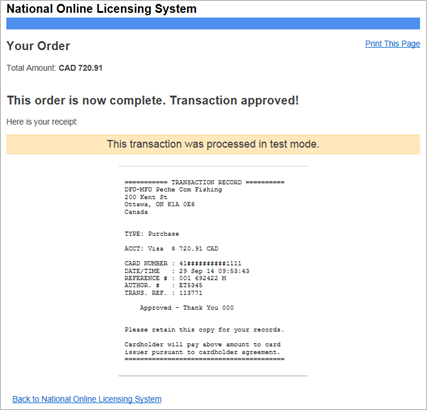
To print a copy of this receipt, click the “Print this Page” hyperlink at the top of the receipt. You should attach this receipt to the Transaction Statement you printed in the instructions outlined in Section 5.3.
5.3.2 Paying Fees via Interac Online
Important Note
To make a payment using Interac Online, you must first be registered with Bank of Montreal, Royal Bank, Scotiabank, Envision Financial, Libro Credit Union or TD Bank because these six banks are the only banking institutions presently registered for Interac Online payments made through the Receiver General Buy Button (RGBB). RGBB is the Government of Canada’s online payment process that is currently being used by the National Online Licensing System. Visa Debit cards are not accepted by the National Online Licensing System.
Click the “Pay Now” button on the “Pay Fees – Checkout” screen after completing the steps outlined above in Section 5.3.
You will be directed to a secure, third-party website where your payment will be processed.
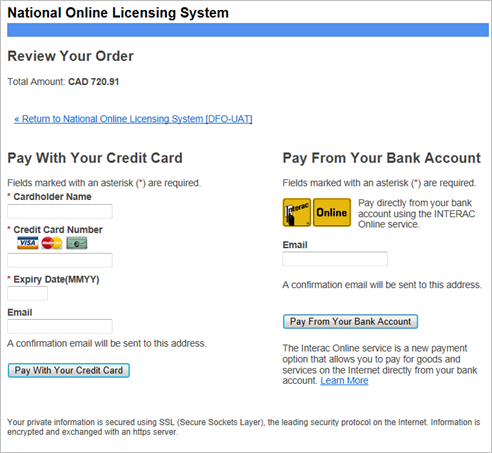
Before you enter your e-mail address, review the total amount of your payment to ensure that it is correct. If it is incorrect or if you need to make any changes, click the “Return to National Online Licensing System” hyperlink.
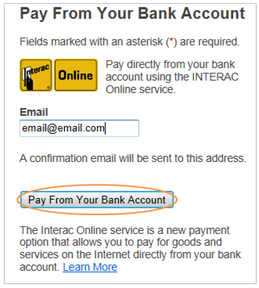
If the information is correct, enter your e-mail address so a confirmation of payment e-mail may be sent to you. Then, click the “Pay from your Bank Account” button.
You will be directed to the Interac Online website, which will prompt you to select your bank. Next, you will log in and select the bank account that you want to pay from. Then, you will be prompted to confirm the payment amount. Once you confirm, a receipt of your payment transaction will appear.
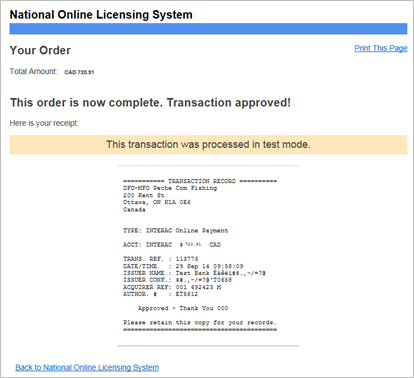
To print a copy of this receipt, click the “Print this Page” hyperlink at the top of the receipt. You should attach this receipt to the Transaction Statement you printed in the instructions outlined in Section 5.3.
5.3.3 Paying Fees via your Financial Institution
1) If you want to pay your fees using telephone banking, online banking, an automated banking machine or at an in-person teller, you need to set up Fisheries and Oceans Canada as a “payee” with your National Online Licensing System Account Number.
2) There are currently a number of major financial institutions offering payee services to DFO, including:
- Bank of Montreal
- Scotiabank
- Royal Bank of Canada
- TD Canada Trust
- National Bank
- CIBC
- HSBC
- Caisse centrale Desjardins du Quebec
- Credit Union Central of Canada
3) If you choose to use the online banking option, the “payee” or merchant name for Fisheries and Oceans Canada will normally be listed as “DFO-MPO Peche Com Fishing.”
Some financial institutions have used alternate payee names such as “DFO-MPO Peche Comm Fishing” or “Peche et Oceans Canada Comm.”
Once you have successfully searched, identified and chosen one of the above “payee” names, you will be prompted to provide your 12-digit National Online Licensing System Account Number.
4) It is possible that your selected financial institution is not a “participating” or “clearing” institution and does not include Fisheries and Oceans Canada as a payee. Adding a payee is at the discretion of each financial institution, and a process that must be initiated by the institution.
In such cases, you may wish to request that your financial institution add Fisheries and Oceans Canada as a payee. If the financial institution will not add Fisheries and Oceans Canada as a payee, you have a number of other options:
- Pay online with a credit card directly through the National Online Licensing System. Under certain conditions, you may use a “pre-paid” credit card if the letters are raised and there is an expiry date on the card.
- Pay using Interac Online, with the exception of Visa Debit cards, through the National Online Licensing System at the following participating financial institutions: Bank of Montreal, Royal Bank, Scotiabank, Envision Financial, Libro Credit Union or TD Bank.
- Pay at another “participating” bank or financial institution that includes Fisheries and Oceans Canada as a “payee” (see Section 3). It is possible that, in these cases, the institution may require you to open an account or pay a transaction service fee.
Note:
You cannot use TelPay third-party electronic bill payment services. Receiver General for Canada requires that fund transfers be directly from the Client's financial institution to the Receiver General, with no middle agent.
Once you have printed your Transaction Statement as indicated at the end of Section 5.3, you may make your payment at or through your bank or financial institution. This may be done through telephone banking, online banking, or an automatic banking machine if you have set up Fisheries and Oceans Canada as a payee with your National Online Licensing System Account Number.
You may also choose to make your payment at the bank in person. To do this, you will need to bring your printed Transaction Statement. You must have your National Online Licensing System Account Number and the amount you wish to pay ready to provide to the bank teller.
Next, you will need to wait a few business days while the bank processes this payment to the Department and, in turn, the Department places the credit into your National Online Licensing System account. You will receive a notification when this credit has been put into your account. Then, you will need to log in to the system to apply this credit to the fee payment that you intended to pay.Footnote 50 You are not finished paying your fees until you allocate the credit that you gave to the bank (and that was placed into your National Online Licensing System account) against these fees.
Important Note
You are not finished paying your fees until you allocate the credit that you gave to the bank (and that was placed into your National Online Licensing System account) against these fees.
5.3.4 Paying Renewal Fees by Cheque
DFO will not accept cheques in person or via mail under any circumstances. All cheques received will be returned to the Client with follow-up information on how to register in the National Online Licensing System or how to appoint a representative to handle their transactions with the system and to receive e-mail notifications on their behalf.
5.4 Applying a Credit
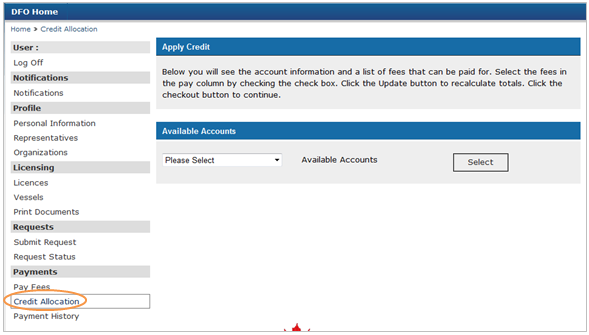
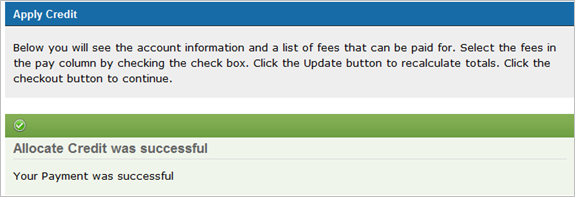
You will receive a notification when a credit has been applied to your National Online Licensing System account if you have chosen to pay your fees via your financial institution.Footnote 51 To complete your fee payment, you will need to apply this credit against the fee you intended to pay. The application of your credit in the National Online Licensing System will ensure that you receive your licences, vessel registrations, etc. Please be wary of the expiry dates attached to your licensing portfolio. If you intend to use the credit allocation option, please try to plan in advance. Click the “Credit Allocation” hyperlink on the left-navigation menu and the “Apply Credit” screen will appear.
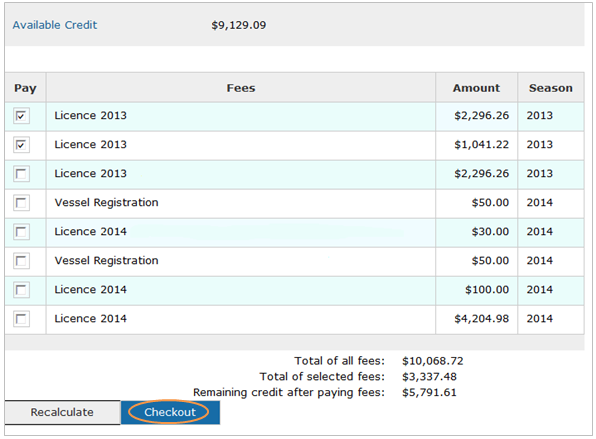
To pay your fees with the credit indicated in the “Available Credit” part of the “Account Information” section, click in the white box beside the fees you wish to pay and a checkmark will appear in each box you click. You may pay one or more of your fees with this credit if there are sufficient funds to do so.
If you are paying more than one fee, click the “Recalculate” button to reflect the total of all fees selected, before you click the “Checkout” button.

The “Apply Credit – Confirmation” screen will appear when you click the “Checkout” button. This screen will show you all the fees to which you decided to apply the credit in your National Online Licensing System account, and the total amount of this payment. Review the screen to ensure that the information is correct. If you want to make any changes, click the “Back” button to return to the “Apply Credit” screen.
If you are ready to proceed, click the “Pay Now” button and your credit will automatically be applied against these fees.
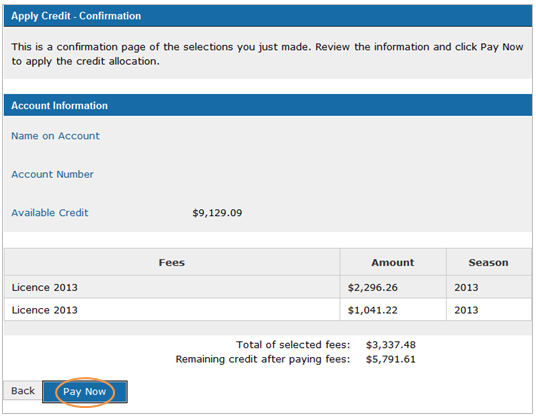
If you are ready to proceed, click the “Pay Now” button and your credit will automatically be applied against these fees.
5.5 Viewing your Payments History
To view your payments, click the “Payment History” link under the “Payments” section in the left-navigation menu. You should review your payment history regularly to ensure that all of your online payments have been processed.
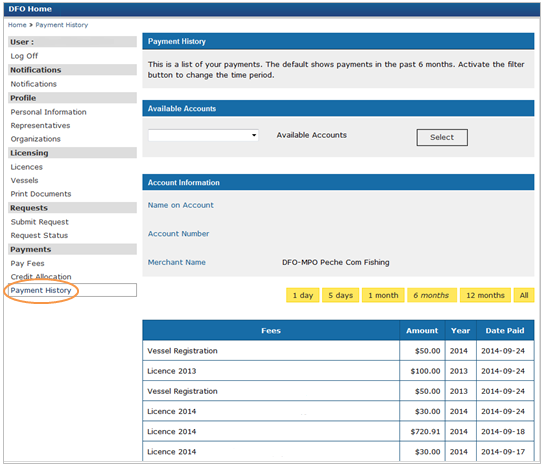
By default, this screen will show you all of the payments that you have made over the past six months. Click on the “1 day” box, if you prefer to review only the payments made over the past day. You may also choose to view payments made over the past five days, 1 month, 6 months, 12 months, or even all of your payments (All).
Important Note
The “Payment History” screen only reflects payments made using the National Online Licensing System.
Once your payment has been processed, the Department will record this information and release your documents to be printed.Footnote 52 Depending on the fees that you paid, this could be your licence, licence conditions, fisher registration, vessel registration or specific request documents.
- Date modified: